How to Upgrade Your Seedr Account

What this tutorial covers
You'll learn how to move from the free plan to a paid Seedr plan. By the end you'll know how to pick the right tier, pay, confirm the upgrade applied, and start using the extra storage, concurrent save slots, and FTP/SFTP/WebDAV access. Upgrades usually apply instantly.
Prerequisites
- A Seedr account. If you don't have one, sign up at /signup first — takes about a minute.
- A payment method: a credit/debit card (processed via FastSpring) or a PayPal account.
- A rough idea of how much storage you need and how many simultaneous saves you want. If unsure, Pro is a common starting point because it unlocks FTP + SFTP.
Walkthrough
1. Open the pricing page
Two ways:
- Go directly to /pricing from the site header.
- Or, from inside your Seedr dashboard, click Upgrade Storage in the top-left.
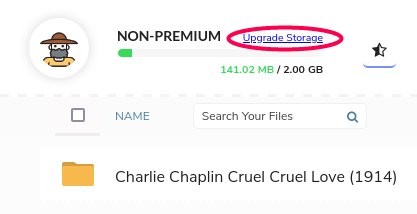.jpg)
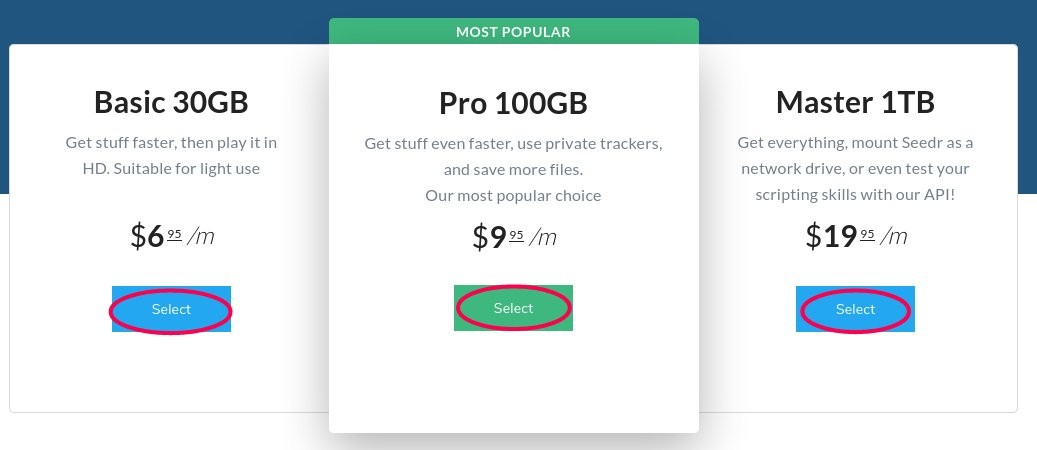
2. Compare the tiers
You'll see the paid tiers alongside the free plan. Headline differences:
- Basic — 50 GB. HD viewing, faster save-to-device speeds, 2 concurrent saves.
- Pro — 200 GB. Adds FTP + SFTP, 5 concurrent saves, private-network support. Includes everything in Basic.
- Master — 1 TB. Adds WebDAV drive on top of FTP/SFTP, 25 concurrent saves, priority support. Includes everything in Pro.
- Gold — top tier. Largest storage ceiling and all Master features.
Exact prices are on the pricing page — they change with promotions, so we don't duplicate them here.
3. Click Select on your chosen plan
The page scrolls down to the payment section, showing the billing amount and terms for that plan.
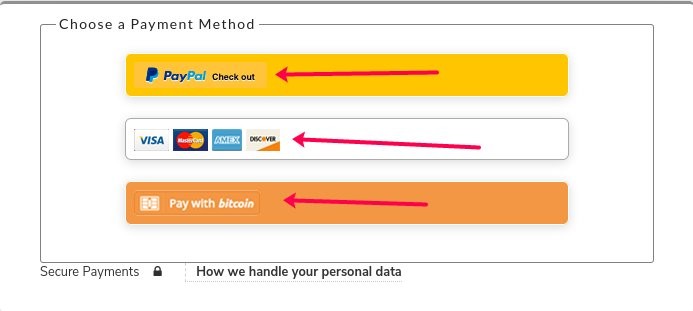
4. Pick a payment method
Two options:
- PayPal — a new tab opens to log in or create an account. Complete checkout there.
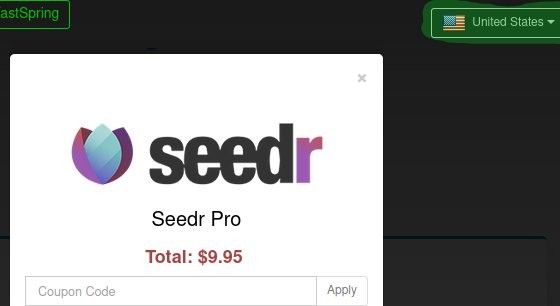
- Credit or debit card (FastSpring) — a secure payment overlay opens on the page. The country/currency selector is in the top-right of the overlay if you need to adjust.
Fill in the fields and submit.
5. Wait for confirmation
You should see a success message on the page and receive a confirmation email. Most accounts upgrade instantly. A small percentage take up to half an hour — that's the edge of normal, not a problem.
6. Verify the upgrade applied
Back in your Seedr dashboard, check:
- Account status (top-left) — the plan name should now read the tier you bought.
- Storage quota — the progress bar should reflect your new ceiling.
- Concurrent save slots — try adding a second or third link at once if your plan supports it.
If the dashboard still shows the old plan after 30 minutes, sign out and back in. If it's still wrong, contact support with the confirmation email attached.
7. Turn on the plan-specific features you paid for
Some benefits need a quick setup step:
- FTP and SFTP (Pro, Master, Gold) — open account settings to see your hostname, username, and port. Guide: mount Seedr over FTP, SFTP, or WebDAV.
- WebDAV (Master and Gold) — same settings panel. Useful for mounting Seedr as a network drive.
- Priority support (Master and Gold) — your tickets are flagged automatically; nothing to configure.
Common mistakes
- Paid, but the dashboard still shows free. Sign out, sign back in — the session sometimes caches the old plan. If it persists after 30 minutes, email support.
- Wrong billing currency. The FastSpring overlay defaults to your detected country. Change it in the overlay's top-right dropdown before submitting — once charged, you can't flip currencies on the same invoice.
- Charged twice by mistake. Usually a browser-back-button retry. Contact support with both receipts; refunds for accidental duplicates are straightforward.
Related reading
- How to use Seedr — beginner's tutorial if you're brand new.
- Organize files in Seedr once you've got room for more files.
- Mount Seedr over FTP, SFTP, or WebDAV to use your Pro/Master/Gold benefits.
Wrap
Pick plan, pay, verify. The whole upgrade usually takes under two minutes, and the benefits activate immediately. Tell a friend too — Seedr's referral program gives bonus storage on both sides.
Was this article helpful?
Related Articles

How to open HEIC photos online on Windows, Android, or any browser
Open iPhone HEIC photos from any device in Seedr’s cloud viewer — no conversion, no codecs, no extra apps — and keep them organized alongside your other files.

Connect Seedr to Infuse (iOS, tvOS, macOS)
Learn how to easily connect your Seedr account to the Infuse app using WebDAV or FTP. View 4K media directly to your Apple TV or iOS device without saving.

Three ways to add links and files in Seedr V2
Learn how to use Seedr V2’s Link button to add media links, scan webpages, upload files from your device, and share to Seedr via PWA or browser extensions.